When Paystand notifies you of a dispute or chargeback, you need to reverse the original payment in NetSuite and re-apply it correctly using a Journal Entry. This article walks you through that process step by step.
📝 Note: A dispute/chargeback means the payment was reversed by the bank or card network. These steps ensure your NetSuite records reflect that reversal accurately.
Before You Begin
- You must have access to NetSuite with permissions to create Journal Entries and edit payment records.
- Have the original Payment Record and Invoice ready to locate in NetSuite.
- Know the customer name and the relevant GL accounts (Accounts Receivable and Bank/Undeposited Funds).
Step 1 — Unapply the Invoice from the Payment
First, remove the link between the original invoice and the payment so the balance is freed up.
- Navigate to the original Payment Record in NetSuite.
- Unapply the invoice from the payment by following the steps in How to Unapply Invoice from Payment.
⚠️ Important: Do not skip this step. The Invoice must be unapplied before you create the Journal Entry, or the records will be out of balance.
Step 2 — Create a Manual Journal Entry
Create a Journal Entry to record the disputed/charged-back amount. Refer to Create a Journal Entry for Disputes in NetSuite for the full walkthrough. Use the following GL account setup:
| Line | Type | Account | Name Field |
|---|---|---|---|
| 1 | Debit | Accounts Receivable | Select the customer from the Name drop-down |
| 2 | Credit |
Dispute Account the one set up in your Paystand integration |
Select the same customer from the Name drop-down |
💡 Tip: Make sure you select the correct customer name in both lines of the Journal Entry. Mismatched names will prevent the JE from applying correctly.
Step 3 — Apply the Journal Entry to the Payment Record
Now go back to the original Payment Record and apply the Journal Entry you just created directly from within the payment.
- Navigate back to the original Payment Record in NetSuite.
- Click Edit to open the payment in edit mode.
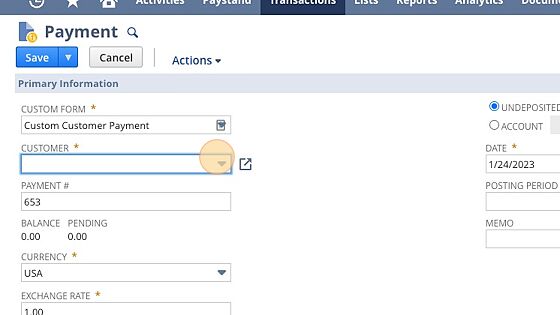
- In the Customer field, confirm the correct customer is selected.
- Scroll down to the Apply section — the Journal Entry you created in Step 2 should appear in the list.
- Check the Apply checkbox next to the Journal Entry.

- Click Save.

💡 Tip: If the Journal Entry doesn't appear in the Apply section, double-check that the customer name on the JE matches the customer on the Payment Record exactly.
✅ The dispute/chargeback is now recorded. The payment is applied to the Journal Entry and your NetSuite records are balanced.